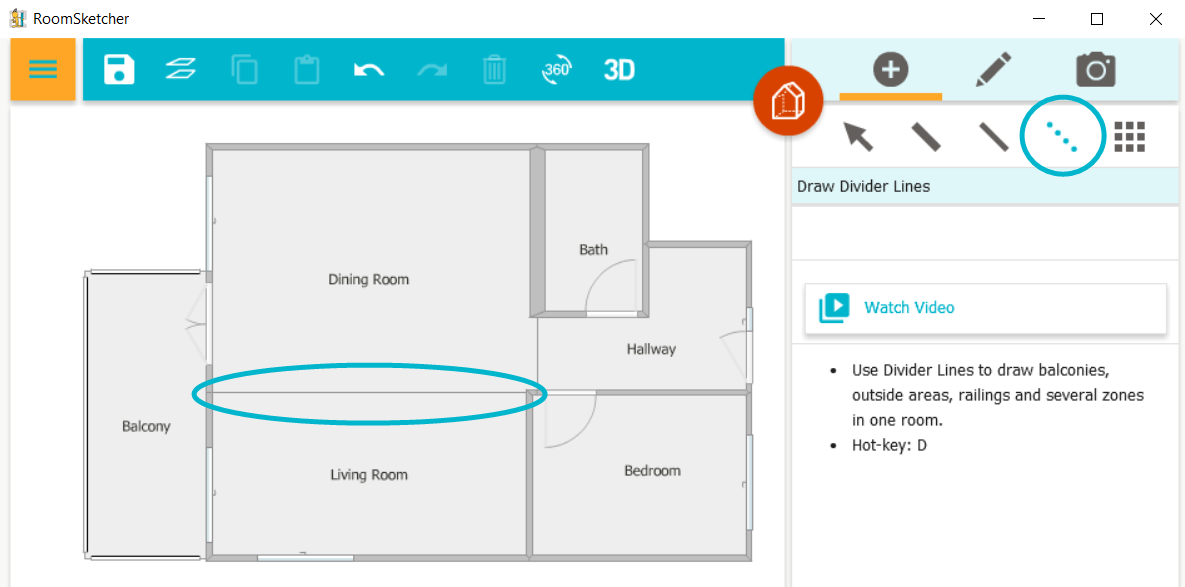
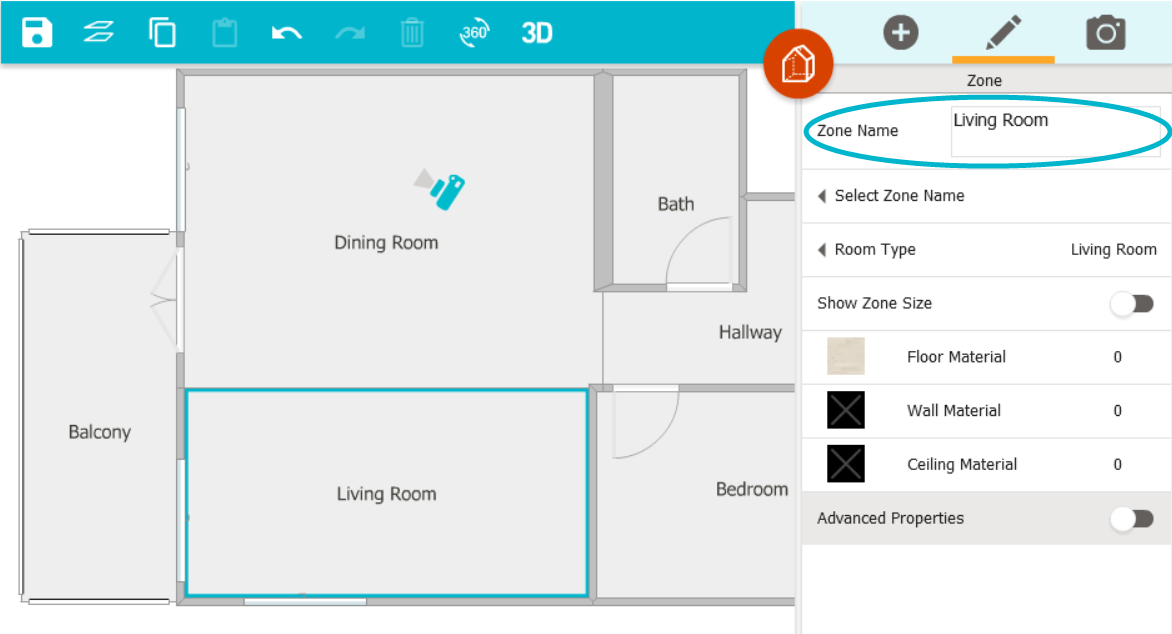
You can place two or more room names in a single room - for example, for a connected dining and living room. There are two ways to do this:
Use the Divider Tool
You can use the Divider tool to create a dividing line across a room. The dividing line will not display in 2D and 3D Floor Plans but will allow you to create two virtual rooms in which to add room names.
- Open Walls mode. (Click or tap the red mode button and then click Walls).
- Click the Divider
tool.
- Draw a line across the room, to divide it into two virtual rooms.

- Click the Select
tool, click inside one of the virtual rooms, and on the right, in Zone Name, type the name of the room.
Tip: You can also use Select Zone Name to choose the name from the room name list.
- If desired, press & drag the room names to move them.
Use a Text Label
You can also use a Text Label to add room names to connected rooms.
- Open Windows etc mode. (Click the red mode button and then click Windows etc.)
- Open the Symbols, Text & Lines category.
- Click to select the Text Label button.

- Click to place the text label on your design. You can press and drag to move the text label.
- With the text label selected, type a room name in the Label field.

- Repeat steps 3 - 5 for any other room names.
Related Articles
Don't Have the App Yet?
Make sure you have downloaded the RoomSketcher App to your computer or tablet.